Home Pricing About Us Contact

RAW Image File Format Explained: Benefits, Uses, Editing

Introduction: The Digital Negative of Modern Photography

Every time you press the shutter, your camera captures billions of tiny bits of light data. Most people never see that data in its purest form. Instead, the camera quickly processes it, compresses it, and hands you a neat JPEG. A RAW image file works differently. It hands you the untouched, unprocessed sensor data — the digital equivalent of a film negative — so you can shape the final photo exactly the way you envision it.

This guide walks through what a RAW image file format really is, how it compares to JPEG and HEIF, which extensions each camera brand uses, and how you can edit RAW files like a pro. Whether you shoot with a beginner-friendly Canon 80D, a Sony mirrorless body, or your smartphone, understanding RAW will change how you think about every image you create.

📸 Turn your RAW captures into gallery-ready photos with our expert photo retouching service today.


What Is a RAW Image File Format?

A RAW image file format is a container that stores minimally processed data straight from a digital camera’s image sensor. Rather than applying sharpening, white balance, contrast, or compression inside the camera, the device writes the sensor readings directly to memory. That preserved data gives photographers the widest possible range of tonal and color information for post-processing.

The Core Idea in Plain English

Think of a RAW file as cake batter and a JPEG as the finished cake. The batter can still become almost anything — vanilla, chocolate, or lemon — because the ingredients remain unprocessed. Once the cake bakes, however, you cannot un-bake it. A RAW file gives you the raw ingredients of light, so you decide the final flavor of your image later on your computer.

Key Characteristics of RAW Files

  • Unprocessed sensor data — the camera writes light values straight to the file.
  • High bit depth — most cameras record RAW at 12, 14, or even 16 bits per channel.
  • Lossless or minimally lossy compression — nearly all original detail stays intact.
  • Metadata-rich — settings like ISO, shutter speed, and white balance travel as editable tags.
  • Non-destructive by nature — edits live in a sidecar file, so the original file never changes.
RAW vs JPEG comparison chart

How a RAW File Is Actually Created

To understand why RAW matters, let’s trace what happens between the moment light hits the sensor and the moment a file lands on your memory card.

Step 1: Light Meets the Sensor

Photons pass through the lens and strike millions of photosites on the sensor. Each photosite measures the intensity of light it receives. A Bayer filter — a grid of red, green, and blue microfilters — sits above the sensor, so every photosite records only one color channel.

Step 2: Analog Values Become Digital Numbers

The sensor’s analog readings pass through an analog-to-digital converter (ADC). The ADC assigns each photosite a numeric brightness value. A 14-bit ADC produces up to 16,384 shades per channel, while an 8-bit JPEG conversion collapses that range to just 256 shades.

Step 3: The Camera Writes the RAW File

Instead of demosaicing (interpolating full RGB values), sharpening, and compressing the image, the camera writes the numeric grid straight to the card. Alongside the pixel data, it embeds metadata such as ISO, aperture, focal length, and lens correction profiles.

Step 4: You Take Over in Post

Now you decide the white balance, contrast, sharpness, saturation, and color grading. Software such as Adobe Lightroom or Capture One reads the RAW file and applies your creative choices on top of the untouched data — a process that mirrors developing a film negative in a traditional darkroom.


RAW vs JPEG: Understanding the Real Difference

The RAW vs JPEG debate never really ends, because each format serves a different purpose. Let’s break the contrasts down side by side.

FeatureRAW FileJPEG File
Bit depth12–16 bits per channel8 bits per channel
CompressionLossless or minimalLossy
File size20–50 MB per photo3–10 MB per photo
Editing flexibilityVery highLimited
White balanceEditable after captureBaked into the file
Sharing convenienceRequires conversionReady to share
Camera burst speedSlowerFaster

When JPEG Wins

  • Sports, events, and journalism where turnaround speed matters
  • Casual social snapshots that need no editing
  • Storage-limited devices such as older phones or small SD cards

When RAW Wins

  • Landscape, portrait, and product photography
  • Difficult lighting like backlit scenes or high-contrast interiors
  • Any image you plan to print, license, or archive

Choose RAW whenever the final quality of the image matters more than immediate convenience. For a closer look at competing modern formats, our HEIF vs JPEG breakdown explains where each option fits.

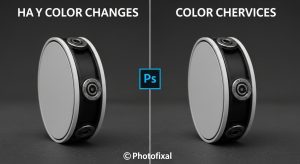
JPEG versus RAW side by side

The Zoo of RAW Extensions: Every Brand Speaks Its Own Language

No single universal RAW extension exists. Instead, each camera manufacturer maintains a proprietary version of the format, which is why RAW files from a Canon body cannot open the same way as RAW files from a Sony body without proper software support. This fragmentation remains one of the most persistent quirks in the imaging industry.

The Major Proprietary RAW Extensions

  • Canon.CRW, .CR2, and the newer .CR3
  • Nikon.NEF and the compact .NRW
  • Sony.ARW, .SRF, .SR2
  • Fujifilm.RAF
  • Panasonic.RW2
  • Olympus / OM System.ORF
  • Pentax.PEF and .DNG
  • Leica.RWL and .DNG
  • Hasselblad.3FR
  • Sigma / Foveon.X3F

DNG: The Universal Alternative

Adobe launched DNG (Digital Negative) in September 2004 as an open, universal RAW format. DNG files are typically 15–20% smaller than proprietary RAW files while preserving the same image quality. Cameras from Leica, Pentax, Ricoh, and many smartphones already save directly to DNG, and the free Adobe DNG Converter can transform almost any brand’s RAW into an archival DNG.

Curious which brand suits you best? Our roundup of the top camera manufacturers explains each brand’s imaging philosophy and RAW ecosystem.


Why Photographers Choose RAW: The Real Benefits

RAW is not about complexity for its own sake. It is about creative control and technical safety. Here are the concrete reasons professionals almost always shoot RAW.

1. Wider Dynamic Range

Because RAW records 12–14 stops of luminance data on modern sensors, you can recover blown-out skies and pull detail out of black shadows with a single slider. JPEG’s 8-bit ceiling clips those extremes forever.

2. Non-Destructive Editing

Every adjustment lives as a set of instructions in a sidecar file. The pixels never change, which means you can revisit the same photo years later and start over from scratch without any quality loss.

3. White Balance Freedom

Set the white balance to auto in-camera, then tweak it precisely during editing. Warm indoor light or cool shade becomes an aesthetic choice rather than a permanent flaw.

4. Superior Color Depth

A 14-bit RAW file records more than 4 trillion possible colors per pixel, while an 8-bit JPEG maxes out at around 16.7 million. That extra headroom eliminates the banding you often see in JPEG skies.

5. Better Noise Reduction and Sharpening

Modern RAW converters apply noise reduction and sharpening algorithms that see the untouched sensor data. The results look noticeably cleaner than any in-camera JPEG can produce.

6. Future-Proofing Your Archive

RAW files preserve the maximum information available. As editing software improves — and thanks to advances in AI-driven editors, it is improving fast — you can re-edit old RAW files with dramatically better results than were possible on the day you took the shot.

✂️ Get pixel-perfect edges on every product shot with our expert clipping path service.


The Honest Downsides of Shooting RAW

RAW is powerful, but it is not free of trade-offs. Weigh these drawbacks before switching your camera off JPEG.

Larger File Sizes

A single RAW file often weighs five to eight times more than an equivalent JPEG. A 24-megapixel mirrorless camera routinely produces RAW files above 40 MB, which fills memory cards quickly. If you’re not sure how much storage you need, our guide on 64 GB card capacity offers real numbers.

Slower Buffer and Burst Speed

RAW data is heavier, so the camera’s buffer fills faster during continuous shooting. Sports and wildlife photographers sometimes fall back to JPEG or compressed RAW to keep frame rates high.

Extra Editing Time

RAW files look flat, dull, and low-contrast straight out of camera. You have to invest editing time to bring them to life. Some photographers embrace this control; others find it exhausting.

Compatibility Headaches

You cannot post a .CR3 file to Instagram or email it directly to a client. Every RAW image needs conversion to JPEG, PNG, or TIFF before it can travel widely.

Software Considerations

Serious RAW editing usually calls for paid software such as Adobe Lightroom, Capture One, or DxO PhotoLab. Free alternatives exist — RawTherapee and darktable are excellent open-source options — but they carry a steeper learning curve.


RAW Bit Depth and Dynamic Range Explained

Bit depth is the concept that gives RAW its edge, so it deserves a clear breakdown.

What Bit Depth Means

Bit depth measures how many discrete brightness levels a file records per color channel. A higher bit depth does not necessarily mean more visible colors — it means more room to stretch the tones without banding or posterization.

  • 8-bit — 256 shades per channel (JPEG standard)
  • 10-bit — 1,024 shades per channel (HEIF and video)
  • 12-bit — 4,096 shades per channel (entry-level RAW)
  • 14-bit — 16,384 shades per channel (most modern DSLRs and mirrorless)
  • 16-bit — 65,536 shades per channel (medium format bodies such as Phase One and Hasselblad)

How This Translates to Real Photography

When you lift a shadow by two stops in editing, an 8-bit JPEG has almost nothing to recover. A 14-bit RAW file still holds thousands of intermediate brightness values, so the shadow reveals clean detail. This is why RAW is essential for landscape, real estate, and product photography — any scene where you must balance bright and dark areas in a single frame.


How to Edit RAW Files: A Beginner-Friendly Workflow

Editing RAW files feels intimidating at first, but the process becomes second nature after a few sessions. Here is a workflow that works for both hobbyists and professionals.

Step 1: Choose a RAW Editor

  • Adobe Lightroom Classic — the industry standard for cataloging and editing
  • Capture One Pro — favored by studio and fashion photographers for its color science
  • DxO PhotoLab — renowned for automatic optical corrections and noise reduction
  • Darktable and RawTherapee — free open-source alternatives with pro-level tools
  • Affinity Photo — a one-time-purchase option with full RAW support

Step 2: Import and Back Up

Copy files from your card to two locations at once: your working drive and a backup drive or cloud storage service. Never wipe the memory card until both copies verify successfully.

Step 3: Apply Base Corrections

Start with lens profile corrections, chromatic aberration removal, and a neutral white balance. These settings form the foundation of your edit.

Step 4: Adjust Exposure and Contrast

Recover highlights, lift shadows, and set a proper black point. Because RAW files hold so much data, small slider movements produce large visual results.

Step 5: Refine Color and Detail

Fine-tune hue, saturation, and luminance for individual color channels. Add sharpening and noise reduction last, so they operate on the finished image.

Step 6: Export the Final File

Export to JPEG for the web, TIFF for print, or PSD for further work in Photoshop. Keep the original RAW file untouched in your archive.

🖼️ Boost e-commerce conversions with our fast, consistent background removal service built for online stores.


Storage Strategy for RAW Photographers

Because RAW files consume significant disk space, storage strategy becomes part of the craft. A three-layer approach works well for most photographers.

Layer 1: Fast Working Storage

Use a high-speed internal SSD or Thunderbolt drive for the shoots you are actively editing. Speed here directly improves editing responsiveness.

Layer 2: Cold Archive

Keep older RAW files on large-capacity HDDs or a NAS system. These drives cost less per terabyte and preserve everything you might revisit later.

Layer 3: Off-Site Cloud Backup

Services such as Backblaze, iDrive, and Amazon Photos protect against hardware failure, theft, and disasters. Off-site backup is the safety net every serious photographer eventually appreciates.


RAW on Smartphones: Apple ProRAW, Google Pixel, and Beyond

Smartphone RAW has matured rapidly. Apple’s ProRAW combines the flexibility of a .DNG file with the computational benefits of the iPhone’s image pipeline. Google Pixel cameras save DNG files that respond beautifully to Lightroom Mobile. Samsung’s Expert RAW app produces DNG files at up to 50 megapixels on flagship Galaxy phones.

Why Mobile RAW Matters

  • Recover HDR scenes even from small sensors
  • Fix white balance under mixed indoor lighting
  • Push shadows and highlights without the JPEG smear artifacts common on phones

Mobile RAW closes the gap between smartphones and dedicated cameras faster every year, especially for travel and everyday documentation.


Common RAW File Problems and How to Fix Them

Even seasoned photographers hit snags with RAW files. Here are the most frequent issues and their fixes.

“My software cannot open this RAW file”

Newer camera bodies often ship before editors add support. Update your RAW converter, install the free Adobe DNG Converter, or use the manufacturer’s own utility (Canon DPP, Nikon NX Studio, Sony Imaging Edge).

“The image looks flat and lifeless”

That flatness is normal. It simply means no styles have been applied yet. Add contrast, adjust the tone curve, and enable a camera profile such as Adobe Landscape or Camera Standard to see life return to the image.

“I accidentally deleted my RAWs”

Stop using the card immediately. Recovery apps like PhotoRec, Recuva, or Disk Drill can often bring back deleted images. Our tutorial on recovering deleted photos walks through the process step by step.

“RAW files are filling my drive”

Convert older archives to lossless-compressed DNG to reclaim 15–20% of space, or move older shoots to an external HDD. Never delete RAW originals of photos you might edit again.

💎 Get flawless, magazine-quality skin with our natural-looking beauty retouching service today.


Who Should Shoot in RAW?

Not every photographer needs RAW every single time. Use this quick decision guide.

Shoot RAW if you…

  • Sell prints, products, or portraits professionally
  • Photograph weddings, real estate, or landscapes
  • Enjoy post-processing as part of the creative process
  • Want to future-proof your archive for years of re-editing
  • Work with brands that expect polished, edited deliverables

Shoot JPEG (or RAW + JPEG) if you…

  • Cover fast-moving news, sports, or wire assignments
  • Need instant sharing on social media without editing
  • Are just starting out and want a simpler workflow
  • Have limited storage and card capacity

Many modern bodies — like the ones featured in our best mirrorless cameras list — let you capture both formats simultaneously, offering the best of both worlds while you learn.


The Future of RAW: Compressed RAW, HEIF, and Computational Photography

The RAW landscape keeps evolving. Sony’s lossless-compressed RAW, Canon’s .CR3 C-RAW, and Nikon’s High Efficiency formats shrink RAW size by roughly 40% with very little visible penalty. Apple ProRAW blurs the line between “unprocessed” and “computationally enhanced” imagery by baking HDR and Deep Fusion data directly into the DNG. Expect the next generation of cameras and phones to lean harder on AI-driven demosaicing, in-camera stacking, and semantic metadata embedded in the RAW file itself.


Real-World RAW Workflow Examples

To make RAW concrete, here are three quick scenarios drawn from working photographers.

Landscape Photographer at Golden Hour

They shoot a 14-bit RAW at ISO 100, then lift shadows by two stops and recover the sky’s magenta cloud detail in Lightroom. A JPEG would clip both extremes.

E-commerce Product Photographer

They capture products on a white sweep in RAW, then batch-process white balance and color accuracy so every SKU matches across the catalog. Many outsource the cut-outs to a professional multi clipping path service to keep production speeds high.

Portrait and Headshot Photographer

They record in RAW to preserve skin-tone gradations, then apply frequency-separation retouching and dodge-and-burn without banding. This is where high bit depth quietly pays for itself.

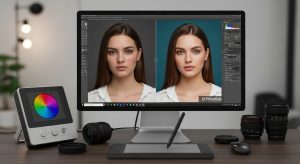
Portrait retouching before and after RAW edit

Best Practices for Long-Term RAW Archiving

RAW archives can last decades if you follow a few disciplined habits.

  • Convert questionable formats to DNG for archival safety
  • Rename files with date and shoot codes (for example, 2026-07-23_WeddingSmith_001.CR3)
  • Store XMP sidecar files alongside proprietary RAW files so your edits stay linked
  • Follow the 3-2-1 backup rule — three copies, two media types, one off-site
  • Verify backups every quarter with checksum tools such as Teracopy or ExactFile

Frequently Asked Questions

1. What is a RAW image file in simple words?

A RAW file is the unprocessed data straight from a digital camera’s sensor. It stores every bit of light information captured at the moment of the shot, so you can adjust exposure, color, and detail later without losing quality.

2. Is RAW better than JPEG for beginners?

RAW gives you more editing flexibility, but it needs more storage and post-processing time. Many beginners choose RAW + JPEG mode to enjoy quick sharing plus a high-quality file for later editing.

3. Can I open RAW files without Photoshop or Lightroom?

Yes. Free options include Adobe DNG Converter, RawTherapee, darktable, Apple Photos, Windows Photos, and each manufacturer’s own free software such as Canon DPP or Nikon NX Studio.

4. Why do RAW files look dull straight out of the camera?

RAW files skip in-camera sharpening, contrast, and saturation processing. They intentionally look flat so you keep full control during editing. Once you apply a profile and basic adjustments, the image comes to life.

5. How much bigger are RAW files than JPEGs?

RAW files are typically five to eight times larger than the same JPEG. A 24-megapixel RAW usually falls between 25 and 50 MB, while the matching JPEG lands between 4 and 8 MB.

6. What is the best RAW format for long-term archiving?

Adobe DNG is widely considered the safest archival format because it is open, well-documented, and supported by most editing software. Proprietary formats can lose support as brands change their pipelines.

7. Do smartphones shoot RAW?

Yes. iPhone Pro models record Apple ProRAW (DNG), Google Pixel phones save DNG, and Samsung flagships offer Expert RAW. Third-party apps like Halide and ProCam extend RAW capture to many other phones.

8. Can I convert a JPEG back into a RAW file?

No. JPEG compression permanently discards data. Once an image saves as JPEG, that original sensor information is gone. Always keep your RAW originals if quality matters to you.


Conclusion: RAW Puts You in the Director’s Chair

Shooting RAW transforms photography from a one-shot outcome into a creative negotiation between you and your image. You gain wider dynamic range, deeper color, editable white balance, and the confidence that your best shots will still hold up when you re-edit them five years from now. Yes, RAW files demand more storage and more time, but the payoff — sharper detail, cleaner shadows, and richer prints — is undeniable for anyone serious about image quality.

Whether you build a portrait portfolio, document brand campaigns, or launch a product line online, RAW is the foundation of professional-grade results. Learn it once, apply it consistently, and every future click will thank you.

🚀 Partner with the pros at PhotoFixal for expertly edited images delivered fast and studio-quality.