Home Pricing About Us Contact

How to Create a Clipping Path in Photoshop (Pro Guide)

A clipping path in Photoshop is a vector outline — drawn mostly with the Pen Tool — that isolates a subject from its background with pixel-perfect precision. It is still, in 2026, the technique that separates a Shopify listing that quietly converts from one that looks amateur, and it’s the reason your favorite brand’s product page has that clean, floating-on-white look no AI eraser has fully cracked.

If you sell on Amazon, Shopify, eBay, or Etsy, this skill is not optional. Amazon’s own product image policy requires a pure white background (RGB 255, 255, 255), with the product filling at least 85% of the frame — a standard that a well-drawn clipping path hits every time, without the fringe halos or chewed-off edges that automated tools still leave on complex products.

This guide walks through exactly what a clipping path is, when it beats masking, how to draw one step by step in Photoshop 2026, how to save the file so it behaves properly in InDesign or on Amazon, and when it’s smarter to outsource the whole job. Everything below is written from a working editor’s perspective — no filler, no fluff.

💡 Get sharper listings in a day: Skip the pen-tool grind and let the pro editors at Photofixal handle your clipping paths with 12-hour turnaround and pixel-clean edges from just a few cents per image.


What Is a Clipping Path in Photoshop, Really?

A clipping path is a closed vector shape that tells Photoshop — and any other program that opens the file — which part of the image to keep visible and which part to hide. Everything inside the path stays. Everything outside becomes transparent or is simply ignored by layout software.

Think of it as a digital cookie cutter for photos. Because the path is built from vectors — Bezier curves anchored by editable points — it stays crisp whether you print a postage-stamp thumbnail or a bus-stop billboard. It also travels with the image file, so a designer opening your TIFF in InDesign three months later sees the same clean silhouette you drew.

Key traits of a real clipping path:

  • Vector-based, not pixel-based — infinitely scalable
  • Non-destructive — original background pixels stay untouched
  • Portable — recognized by InDesign, Illustrator, QuarkXPress, and most print RIPs
  • Precise on hard edges — bottles, boxes, shoes, phones, appliances, furniture
  • Lightweight — adds only a few kilobytes to your file

If you’d like a wider tour of the tools you’ll touch during this workflow, our overview of Photoshop’s toolbar walks through every icon and its shortcut.


Why Clipping Paths Still Matter in 2026 (Even With AI Remove-Background Tools)

AI background removers like Remove.bg and Photoshop’s own Remove Background button have improved dramatically over the last two years. For a social post, they’re often good enough. But the moment a product has a reflective edge, glass, semi-transparent packaging, wispy strings, or overlapping straps, automatic selections start eating pixels or leaving a gray halo you can’t unsee.

A hand-drawn clipping path solves that in a single pass. And beyond the quality gap, there’s a workflow reason pros still draw paths by hand:

  • Consistency across a full catalog — every one of 5,000 SKUs looks identical
  • Marketplace compliance — Amazon, Walmart, and eBay reject fringed or dirty edges
  • Reusable selections — one path can drive drop shadows, color changes, and masks later
  • Print-ready output — designers can flow text around the product silhouette in InDesign
  • Cleaner shadows and reflections — because the edge is mathematically perfect

Clean product photography has a real revenue impact. Shopify’s own product photography guide notes that consistent, high-quality product images directly influence buying confidence, and every marketplace that ranks listings on quality score rewards you for hitting the specs.


Clipping Path vs Image Masking: Which Do You Actually Need?

This is the single most-asked question in product editing, and the answer is refreshingly simple: use a clipping path for hard edges, and an image mask for soft edges.

FactorClipping PathImage Masking
Best forHard edges: bottles, shoes, boxes, phonesSoft edges: hair, fur, feathers, smoke, glass
Primary toolPen ToolChannels, Refine Edge, brush masking
Edge qualityCrisp, mathematicalRealistic, semi-transparent
SpeedFast on simple shapesSlower, more skilled
OutputVector path saved in fileAlpha channel or layer mask

Real projects often need both stacked together — think of a model wearing a fur coat, a wig on a mannequin, or a bottle of perfume with mist swirling around it. That combined delivery is what studios call a path-plus-mask file, and it’s the safest choice whenever a product has any soft edge that a pure vector outline would flatten.

If your product has flyaway hair or wispy fibers, our image masking service is the right call instead of forcing a path where it doesn’t belong.


The 6 Types of Clipping Paths (And Roughly What They Cost)

Not every image needs the same effort, and studios grade paths by complexity so pricing scales with reality. Knowing the type helps you brief a freelancer accurately or block in-house time properly.

  • Basic clipping path — simple shapes with two to four curves: books, phones, boxes, plates
  • Simple clipping path — mild curves, single object: mugs, bottles, watches
  • Medium clipping path — 8–12 curves, moderate detail: shoes, bags, single-strand jewelry
  • Complex clipping path — multiple curved parts: bicycles, group products, spoke-back chairs
  • Super-complex clipping path — fine detail with holes: chains, nets, wicker baskets, filigree jewelry
  • Multi clipping path — several separate paths inside one image, each usable independently

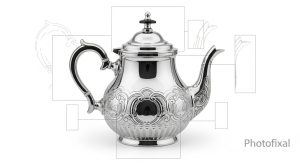
Multi-clipping is where this technique becomes genuinely powerful. Studios draw one path per element — say the sole, upper, and laces of a sneaker — then use each path independently to change color, sharpen, or shadow that region alone without touching the rest.

💡 Selling a whole product line? Our multi-clipping path service isolates every element separately, so you can recolor or restyle any part without redoing the whole image.

Multi clipping path on complex products

How to Create a Clipping Path in Photoshop: Step-by-Step (2026 Method)

Below is the exact workflow professional editors follow in Photoshop 2026. The steps are identical in every recent version from CC 2019 onward. Give yourself around 3–5 minutes for a simple product and 15–30 minutes for a complex one until the muscle memory kicks in.

Step 1 — Open the Image and Duplicate the Background Layer

Open your product photo, then press Ctrl + J (Windows) or Cmd + J (Mac) to duplicate the background layer. Working on a copy keeps the original pixels safe if you need to start over.

Step 2 — Zoom In to 300–500%

Hit Ctrl + + until you can clearly see each edge pixel. Zoomed-in paths are always cleaner than zoomed-out guesses. Use the space bar to grab the Hand tool and pan around while you work.

Step 3 — Select the Pen Tool (P)

Grab the Pen Tool from the toolbar or press P. In the options bar at the top of the screen, switch the mode from “Shape” to “Path” — this is the setting most beginners miss, and it changes everything downstream. If you’d like a deeper drill on the whole toolbox, our master Photoshop tools guide covers every modifier in one place.

Photoshop Pen Tool set to Path mode

Step 4 — Place Your First Anchor Point

Click once on the edge of the product. That first click drops your starting anchor. Aim to place points on natural curve transitions — the tops of curves, corners, and inflection points — not evenly spaced around the shape.

Step 5 — Draw Around the Product

  • For straight edges: simply click at the next corner.
  • For curved edges: click and drag in the direction of the curve. That pulls out Bezier handles which shape the curve between two points.
  • To end a curve and start a straight line: hold Alt (Option) and click the anchor you just placed to remove its outgoing handle.
  • To adjust as you go: hold Ctrl (Cmd) to temporarily switch to the Direct Selection Tool and nudge the point or its handles. This shortcut is baked into Photoshop by default, per Adobe’s own path-editing documentation.

Golden rule from working retouchers: use the fewest anchor points possible. Too many points create jagged, wobbly edges. Place a point only where the shape actually changes direction, and let the Bezier handles do the smooth work in between.

Step 6 — Close the Path

Continue clicking around the entire product. When you reach your starting anchor, hover until you see a small circle beside the pen icon, then click to close the loop. You now have a “Work Path” — but it isn’t safe yet.

Step 7 — Save the Work Path

Open the Paths panel (Window → Paths). You’ll see “Work Path” written in italics — that italic type means it’s temporary and one click away from being lost forever. Double-click it, give it a real name like “Path 1,” and hit OK. Now it’s permanently saved inside the file.

Step 8 — Convert to a Clipping Path

Still in the Paths panel, click the small menu icon in the top-right corner and choose “Clipping Path…”. A dialog appears asking for the path name and a “Flatness” value.

About flatness in plain English: flatness controls how many short straight lines Photoshop uses to approximate your curves when the file goes to a printer. The usable range is 0.2 to 100, and defaults change nothing if you leave the field blank — which is exactly what most modern workflows want. If you must enter a value, 1 is a safe default for average paths, 0.3 suits a complex path with many subtle curves, and 8–10 is often recommended for high-resolution output on 1200–2400 dpi devices to avoid PostScript errors on very complex paths. Click OK when done. The path name in the panel now appears outlined — visual confirmation that it’s officially a clipping path.

Step 9 — Save the File in the Right Format

  • For print, InDesign, or QuarkXPress: save as .TIFF, .EPS, or .PSD
  • For web with transparency: load the path as a selection with Ctrl + Enter, invert with Ctrl + Shift + I, delete the background, and save as .PNG
  • For layered editing later: always keep a master .PSD alongside your export

Pro Tips for Cleaner, Faster Clipping Paths

Speed and quality come from small habits, not shortcuts. These are the practices real production editors lean on every day:

  • Zoom to 300–500% before drawing — always
  • Feather is your enemy — a clipping path should never have feather values above 0.2 px
  • Enable Rubber Band preview in the Pen Tool options for a live preview of the next segment
  • Draw 1–2 px inside the edge — hides any residual background fringe when the path is applied
  • Use the Convert Point Tool to switch anchors between corner and smooth mid-path
  • Save every five minutes — Photoshop crashes are always the last problem you expected
  • Group paths logically in the Paths panel for multi-clipping jobs (Path 1 = outline, Path 2 = shadow zone, Path 3 = color area)
  • Learn the shortcuts: P for Pen, A for Direct Selection, Ctrl + H to hide the path preview

If Photoshop itself feels overwhelming and you’re still finding your footing, our roundup of easy photo editing software for new users is a gentler on-ramp before you commit to the full Photoshop workflow.


Common Clipping Path Mistakes to Avoid

Even experienced retouchers slip on these at the end of a long day. Read once, save yourself twice.

  • Too many anchor points, creating a polygonal, jagged outline
  • Placing points on random pixels instead of at natural curve peaks
  • Forgetting to close the path (an open path can’t become a clipping path)
  • Working at 100% zoom and missing edge halos entirely
  • Skipping the “Save Path” step and losing the Work Path with the next click
  • Delivering .JPG — JPEGs strip transparency and often the path metadata too
  • Heavy feather to hide a bad path — it just softens the whole edge and looks worse
  • Ignoring flatness on complex paths destined for print, then hitting PostScript errors at the RIP

💡 Add depth after the cutout: Want your isolated products to feel three-dimensional instead of pasted-on? Try a natural drop shadow from Photofixal — a small touch that dramatically boosts perceived quality.


Real-World Uses for Clipping Paths

Clipping paths quietly power most of the images you see in commerce and print. The highest-value use cases include:

  • Amazon, Walmart, Shopify, and Etsy listings — pure white backgrounds required
  • Print catalogs — designers flow body copy around the isolated product
  • Composite marketing images — placing the same product on different lifestyle scenes
  • Color swatch generation — one path drives 12 color variants of the same t-shirt
  • Ghost mannequin photography — hollow-body apparel shots without a visible mannequin
  • Real estate listings — sky replacement and object removal
  • Automotive — glossy car bodies where AI removers cut off reflections
  • Jewelry — chains, gemstones, and tiny holes needing pixel-level precision

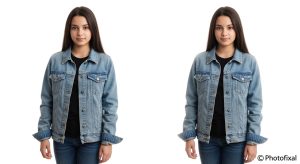
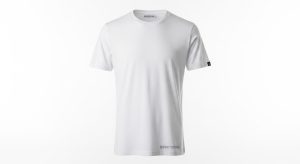
For apparel brands specifically, pairing a clipping path with a ghost mannequin edit creates the “invisible model” look that big brands like Zara and ASOS made standard.

Apparel product with clean clipping path on white

Using a Clipping Path in InDesign, Illustrator, and Beyond

The real magic of the clipping path is that it lives inside the image file. Once you save the PSD, TIFF, or EPS, any Adobe application recognizes the embedded path automatically.

In InDesign, place your image via File → Place, then head to Object → Clipping Path → Clipping Path, open the Type dropdown, and pick Photoshop Path. Choose the specific path from the Path menu, and InDesign will honor exactly the shape you drew — hiding the background instantly and letting text wrap around the product’s true silhouette. Adobe’s InDesign clipping paths guide confirms this method works with any TIFF, EPS, or Photoshop file that contains a saved path or alpha channel.

Illustrator behaves similarly — open the PSD, and the clipping path shows up as a live vector object you can edit further.

For web use, you don’t apply the path directly; you use it to generate transparency, then export to a modern web format. If you’re weighing image formats for your storefront, our comparison of HEIF vs JPEG covers when each format wins on file size and quality.


Marketplace Rules: What Amazon, Shopify, and eBay Actually Require

Each marketplace enforces its own image rules, and a clean clipping path helps you clear all of them without rework.

  • Amazon main image — pure white background (RGB 255, 255, 255), product fills at least 85% of the frame, no props, no text, no logos, no borders, and a minimum long side of 1,000 px per Amazon Seller Central
  • Walmart Marketplace — solid white background, minimum 1,000 × 1,000 px, JPEG or PNG
  • eBay — white or neutral background, no watermarks, no text overlays on the primary image
  • Shopify — no strict enforcement, but white or transparent PNG remains the best-practice default
  • Etsy — cover photo works best on white or a consistent brand background, with the product filling most of the frame

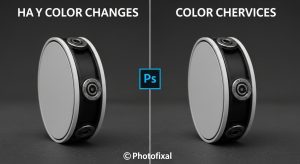
💡 Need a color your client didn’t buy? Our color change service uses your clipping path to swap tones flawlessly — one shot, dozens of variants, all matching.


Photoshop’s One-Click Remover vs. a Hand-Drawn Path

Photoshop 2026 ships with a genuinely useful Remove Background button and a Select Subject AI. Both are great for social posts, internal decks, or a quick blog thumbnail. They fall apart, however, on:

  • Glass, acrylic, and transparent packaging
  • Reflective metals (jewelry, cutlery, chrome car parts)
  • Wispy hair on a similar-tone background
  • Fine mesh, netting, and lace
  • Products photographed against a busy or same-tone backdrop

A hand-drawn clipping path stays reliable across all of them. The smartest agencies now run a hybrid workflow: click Select Subject to get a rough starting selection, convert it to a work path from the Paths panel menu (Make Work Path, tolerance 1–2 px), then clean up manually with the Pen Tool. This approach can shave real time off simpler products while still holding professional edge quality on the tricky bits.

If you’re comparing background-removal approaches beyond Photoshop itself, our roundup of the best AI photo editing tools tests the current field honestly.


When to Outsource Clipping Path Work Instead of DIY

Doing your own clipping paths is a rite of passage — until you have 400 SKUs and a Monday deadline. That’s usually when outsourcing starts paying for itself.

Outsource when:

  • You have 50 or more product images per week
  • Your team’s time is better spent shooting or marketing than clicking anchor points
  • Your products include hair, fur, glass, or fine detail you can’t clip cleanly yourself
  • You need 24-hour or same-day turnaround for a launch
  • You want consistent quality across a full catalog handled by different people

Realistic 2026 pricing runs roughly $0.25–$0.50 for basic paths, $0.50–$1.50 for standard products, $2.50–$5 for complex work, and $5–$10+ for super-complex or multi-path deliveries. That’s cheaper than a single hour of most in-house designers’ time. Any reputable studio — Photofixal included — will offer a free trial so you can vet quality before committing.

Multi clipping path used for product color variants

What to Do After the Clipping Path

The path itself is only step one. Most sellable images need a few more touches before they hit a live product page:

  • Drop shadow — reintroduces depth so the product doesn’t look pasted on
  • Color correction — matches skin tones, fabric colors, and metal warmth to real life
  • Photo retouching — removes dust, scratches, threads, and fingerprints
  • Reflection creation — expected for premium jewelry and cosmetics
  • Resizing and format export — hitting each marketplace’s exact pixel spec
  • Mockup placement — dropping the clean product into lifestyle scenes for ads

For lifestyle imagery running alongside your product shots, our photo retouching service keeps team, model, and campaign photos as polished as your listings themselves.


Best Software Alternatives to Photoshop for Clipping Paths

Photoshop is the industry standard, but it isn’t the only serious option in 2026.

  • Adobe Photoshop CC 2026 — the gold standard, unbeaten Pen Tool control
  • Affinity Photo 2 — a one-time purchase, near-Photoshop parity for a fraction of the cost
  • GIMP — free and open-source, steeper learning curve
  • CorelDRAW / Photo-Paint — favored by many Windows print shops
  • Clip Studio Paint — surprisingly capable Pen Tool if you already own it for illustration

Pure AI tools like Remove.bg, Photoshop’s Remove Background, or Canva’s BG Remover are excellent for a quick social post but shouldn’t be your final answer for marketplace-grade images. For a wider look at the toolchain, our list of the best raster image editing software breaks each option down by budget and workflow.


Frequently Asked Questions

What exactly is a clipping path in Photoshop?

A clipping path is a closed vector shape created with the Pen Tool to isolate a subject from its background. When saved in a TIFF, EPS, or PSD file, everything outside the path becomes transparent or is ignored by layout applications like Adobe InDesign.

How long does it take to make a clipping path?

A basic product clipping path usually takes 2–5 minutes once you’re familiar with the Pen Tool. More complex products with holes, curves, or intricate details can take 20–45 minutes, while multi-clipping path projects with separate color-editing regions may take over an hour per image.

Is a clipping path the same as a clipping mask?

No. A clipping path is a vector outline embedded inside an image file, while a clipping mask is a Photoshop layer feature that uses one layer’s shape to control the visibility of another. Although both isolate parts of an image, they serve different purposes.

Which file formats support clipping paths?

PSD, TIFF, EPS, and AI files can store clipping paths natively. PNG supports transparent backgrounds created from a clipping path but cannot store the path itself. JPEG supports neither clipping paths nor transparency.

Can I make a clipping path without the Pen Tool?

Yes, but it’s not ideal. You can create a selection with tools like Quick Selection or Object Selection and convert it into a work path from the Paths panel. However, these paths are usually rough and require manual refinement with the Pen Tool for professional-quality results.

How many anchor points should a clean clipping path have?

A clean clipping path should use as few anchor points as possible. Most standard product images need around 15–40 anchor points, depending on the shape. Automatically generated paths often contain hundreds of unnecessary points, resulting in jagged and less accurate edges.

Do I need Photoshop to open a clipping path?

No. Many applications can read embedded clipping paths directly from TIFF, EPS, or PSD files, including Adobe InDesign, Adobe Illustrator, QuarkXPress, older versions of Microsoft Word, and most professional print RIP software.

Is outsourcing a clipping path really worth it?

For businesses handling large volumes of images, outsourcing is often the most cost-effective option. Professional clipping path services typically cost $0.25–$2.00 per basic image, which is significantly less than the cost of an hour of in-house designer time while ensuring consistent, high-quality results across an entire product catalog.

Final Thoughts

The clipping path is one of those quiet skills that separates amateur product photos from listings that actually convert. The Pen Tool has a genuine learning curve — nobody makes clean paths on their first afternoon — but once you internalize the rhythm of “few anchors, smooth curves, save the path, export clean,” you can process an entire catalog in a single sitting. Whether you’re a solo Shopify seller, an in-house brand designer, or a photographer prepping catalog files, mastering this one technique pays back every single week.

And when the volume outgrows your patience, professional editors exist for exactly this reason. Handing off the pixel-pushing frees you to spend that time on the parts of your business only you can do.

🎯 Get catalog-ready product images the easy way: Try Photofixal’s professional clipping path service — free trial, 12-hour turnaround, and pricing from just a few cents per image, with pixel-clean edges every time.