Home Pricing About Us Contact

Photos vs Real Life: 10 Reasons You Look Different + Tips

You catch a glimpse of yourself in the bathroom mirror on a good hair day and think, “Not bad at all.” Ten seconds later a friend snaps a candid photo, hands you the phone, and suddenly a completely different person stares back. The jaw looks softer, the nose looks bigger, the smile looks stiff, and every ounce of confidence you had drains out through your fingertips. If that scene feels painfully familiar, take a deep breath — you are not broken, your face is not the problem, and you are definitely not alone.

Photos and real life play by different rules. Your brain, your bathroom mirror, the phone lens, the ceiling light, and the exact 1/125th of a second the shutter fires all combine to produce an image that rarely matches the version you carry of yourself. That mismatch has a name in science, a stack of studies behind it, and — thankfully — a handful of very practical fixes.

In this deep-dive guide, I unpack the ten biggest reasons you look worse in photos than in real life, and I share the exact tricks photographers, psychologists, stylists, and retouchers use to close the gap. No filters. No plastic surgery. Just physics, psychology, and a few smart adjustments you can apply the next time a camera comes out.

👉 Turn any average shot into a portfolio-worthy image. Let our expert editors handle the details cameras get wrong — explore our full-service photo retouching solutions today.

Quick Answer: Why You Look Different in Photos

Photos capture a two-dimensional, un-reversed, frozen fraction of a second, while real life shows you a moving, three-dimensional, mirror-flipped version of yourself. Layer lens distortion, unflattering light, and your brain’s built-in familiarity bias on top, and the result almost always feels unfamiliar — but it is rarely inaccurate.

The main culprits, in short:

  • Mirror-flip familiarity (the mere-exposure effect)
  • Focal length and lens distortion
  • Frozen micro-expressions the brain normally edits out
  • Harsh, flat, or overhead lighting
  • Camera angle and body posture
  • Skin oil, makeup, and clothing that photograph poorly
  • Self-critical perception bias
  • Low-quality sensors and heavy JPEG compression

Now let’s unpack each factor — and, more importantly, how to fix it.

1. Your Brain Prefers the Mirror Version of You

Every morning you meet your reflection, and every reflection flips your face left-to-right. Your brain memorizes that flipped version as “you,” so the moment a camera shows the un-flipped, true-to-life orientation, small asymmetries suddenly scream for attention. That eyebrow that sits half a millimeter higher? Invisible in the mirror. Impossible to un-see in a photo.

Psychologists call this the mere-exposure effect, and the Wikipedia entry on mere-exposure effect traces it back to social psychologist Robert Zajonc’s landmark 1968 paper Attitudinal Effects of Mere Exposure. His hypothesis was elegantly simple: the more often we encounter something, the more we tend to like it — a bias that shapes everything from music tastes to romantic attraction. Nine years later, researchers Mita, Dermer, and Knight extended the theory to faces. In their 1977 study, participants preferred mirror-image photos of themselves, while their close friends preferred the true, non-reversed versions of the same subjects. Both groups liked the version they already knew.

How to Fix It

  • Look at more photos of yourself, briefly and often. Repeated short exposures increase liking faster than long, obsessive stares.
  • Turn off “mirror selfie” mode on your phone so the preview matches what others see.
  • Try a True Mirror (a non-reversing mirror made from two mirrors joined at 90°) once — meeting the real you is genuinely eye-opening.
  • Remind yourself that your friends and family love the version photos show, because that is the only version they have ever known.

2. Your Phone’s Wide-Angle Lens Distorts Your Face

Most smartphones ship with a fairly wide front camera in the range of 22 mm to 28 mm full-frame equivalent. That short focal length exaggerates whatever sits closest to the sensor — usually your nose, chin, or forehead — while pushing your ears and hairline backward. The math is unforgiving: at arm’s length, your nose can end up 30% closer to the lens than your ears, so it renders 30% larger relative to the rest of your face.

Portrait photographers avoid this pitfall by shooting between 50 mm and 135 mm, with 85 mm widely regarded as the sweet spot for natural facial proportions. The comprehensive focal length breakdown at Decaf Journal shows exactly how the same face changes shape as the focal length climbs — the 85 mm frame flatters bone structure, compresses perspective gracefully, and preserves the true proportions your brain expects.

Face shape changes across different lens focal lengths

How to Fix It

  • Step back and zoom in rather than holding the phone close.
  • Use the rear camera whenever possible; its main lens is far less distorting than the selfie sensor.
  • Ask a friend to shoot from six to eight feet away.
  • Understand how the parts of a camera work together, so you can pick the right tool for the shot.
  • For dedicated cameras, invest in an 85 mm or 105 mm prime lens for portraits.

3. Photos Freeze Micro-Expressions Your Brain Normally Skips

In real life your face is a moving canvas. People experience you as a continuous stream of blinks, half-smiles, laughs, and small adjustments. A single photograph, however, chops that stream into a razor-thin slice — often just 1/125th of a second long. Sometimes the slice lands mid-blink, mid-word, or mid-swallow, freezing a moment your brain would normally edit out during a live conversation.

Once frozen, that awkward frame gets scrutinized under a microscope. You notice the half-closed eye, the flat lip corner, the frown line that flashed for a single frame — and you assume it represents “how you look.” In truth, it lasted less than a heartbeat.

How to Fix It

  • Ask for burst mode. Modern phones capture ten or more frames per second, giving you a menu of candidates.
  • Never hold a smile for more than two seconds; genuine grins turn rigid almost immediately.
  • Blink slowly right before the count, then open your eyes softly on “three.”
  • Think of a specific happy memory to trigger a real, Duchenne smile — the kind that crinkles the corners of your eyes and, according to the American Psychological Association, is considered the sole reliable marker of true enjoyment.
  • Practice small talk mid-shoot to keep your face fluid and expressive.

4. Harsh, Flat, or Overhead Lighting Kills Dimension

Light sculpts a face more than any other single variable. Overhead fluorescent tubes carve dark eye sockets. Direct noon sun flattens the bridge of the nose and burns the forehead. On-camera flash blasts every pore into full visibility while erasing the soft shadows that define your cheekbones. That’s precisely why passport photos, driver’s licenses, and last-minute event snapshots so often look grim — they use the worst possible light.

Professional portrait photographers rely on soft, directional light landing at roughly a 45-degree angle to the face. That angle sculpts the jaw, adds a lift under the eyes, and hides small imperfections. Educator Sandra Coan explains that on-camera flash tends to produce harsh shadows, bright hotspots on the skin, and a flat look with almost no dimension — the recipe for an unflattering image.

Soft natural window light in a portrait session

How to Fix It

  • Face a large window during daylight hours for the softest key light on earth.
  • Skip overhead noon sun; find open shade instead.
  • Switch off the built-in flash whenever possible.
  • Shoot during golden hour, one hour after sunrise or before sunset, for warm skin tones.
  • For selfies, position the light in front of your face, never behind — backlighting turns you into a silhouette.

📸 Bad lighting ruined an otherwise great shot? Our specialists rebalance skin tone, tame harsh shadows, and restore dimension through targeted beauty retouching that never looks overdone.

5. Camera Angle Changes Your Face More Than You Think

The angle at which a lens meets your face effectively rewrites your bone structure. A camera held below chin level doubles the chin, shortens the neck, and widens the jaw. A lens held above eye level does the opposite: it elongates the face, sharpens the jaw, and enlarges the eyes. That is exactly why every seasoned influencer holds the phone slightly high.

Side angles create their own problems. If a photographer stands too far to your left or right, the closer half of your face compresses while the far half stretches, magnifying any natural asymmetry that would otherwise pass unnoticed.

How to Fix It

  • Raise the phone slightly above eye level, then tilt your chin down and forward like you are reaching for the lens with your forehead.
  • Turn your body 30–45 degrees off-axis, then rotate the face back toward the camera.
  • Keep your ears slightly ahead of your shoulders to elongate the neck line.
  • Avoid the up-the-nose angle at all costs — no one photographs well from below.
  • Practice three angle variations in your mirror so you know your best side by heart.
Confident man posing outdoors with flattering angle

6. Bad Posture and Stiff Body Language Sabotage the Shot

Slumped shoulders, a jutting neck, or a rigid soldier stance broadcast tension the instant the shutter clicks. Bad posture also compresses the torso, adds visual weight, and eliminates the natural S-curve that makes portraits feel alive. Your brain reads a tense body the same way it reads a nervous voice — instantly and without permission.

Portrait photographer Nick Lalor has spent decades studying this exact issue. In his popular breakdown at Nlalor Photography, he explains that stiff or unnatural poses signal discomfort and recommends imagining “a string pulling you up from the top of your head” — a mental cue that instantly lengthens the neck and rolls the shoulders into place.

How to Fix It

  • Roll your shoulders back and down just before the click.
  • Shift your weight onto the back foot for a relaxed hip line.
  • Create small triangles: bend an elbow, place a hand on a hip, cross an ankle.
  • Inhale slowly, then exhale as the photographer counts down.
  • Keep moving between frames; motion prevents freeze-frame stiffness.
  • Never crush your arms against your torso — they will look twice as wide.

7. The Wrong Clothing or Colors Steal Attention From Your Face

Bright neon shirts, chaotic prints, and shiny synthetic fabrics act like billboards that pull the eye away from your expression. Ill-fitting clothes distort proportions, and colors that clash with your skin undertone drain warmth from your complexion faster than any bad light. The goal of dressing for the camera is not fashion-forward — it is face-forward.

Fabric matters just as much as color. Cotton, wool, silk, and linen absorb light softly, while polyester and satin can throw distracting hotspots when a flash fires. Small details like a wrinkled collar or a twisted seam scream on camera far louder than they do in a mirror.

How to Fix It

  • Choose solid, mid-tone colors that flatter your undertone.
  • Avoid tight logos or busy prints around the face.
  • Iron everything; creases photograph twice as loudly as they appear in person.
  • Layer matte fabrics like cotton, wool, and linen.
  • Bring two outfits and compare quick on-camera previews before committing.

If you run an e-commerce store or a personal brand, a professional multi clipping path service can isolate every garment cleanly, letting the wearer and the outfit look their sharpest without background noise.

8. You Are Your Own Harshest Critic

Even when a photo is technically flawless, you may still cringe at it. That’s because you inspect your own images with a magnifying glass while everyone else views them from six feet away. Your eyes hunt for the double chin you have never noticed, the faint line beside your nose, the tiny asymmetry in your smile. Meanwhile, friends and colleagues register the whole picture — your energy, your presence, the joke you were mid-telling.

Portrait photographer Lisa Kathan captured this brilliantly on her blog on why photos look different, pointing out that our brains immediately scan for perceived flaws when we look at ourselves, but others never analyze our photos the same way. They are not studying every millimeter. They are simply seeing you.

How to Fix It

  • Look at the photo once, then set it aside for 24 hours before you judge it.
  • Ask three trusted people what they notice; they almost always name a feeling, not a flaw.
  • Try the “reverse zoom” trick — view the image at arm’s length before pixel-peeping.
  • Journal briefly about what you like in the photo, not just what you dislike.
  • Remind yourself that self-perception is filtered through mood, hunger, sleep, and stress.

Want to see your best angle without fighting the camera? Our detail-oriented team polishes skin, brightens eyes, and refines edges with professional headshot retouching that stays 100% you.

9. Skin Texture, Oil, and Makeup React Differently on Camera

Cameras record wavelengths and reflections that human eyes happily ignore. Oily T-zones become bright hotspots. Matte foundations photograph slightly ashier than they appear in the mirror. Powder-only makeup can settle into fine lines and look cakey, while shimmery highlighters can turn into blinding reflections under direct flash. Even your favorite lipstick can shift a shade cooler under mixed lighting.

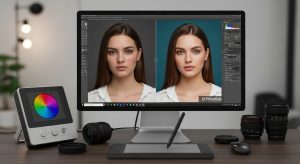
Skin also carries temporary redness, blotchiness, or dark circles that stand out much more in a still frame than during a moving conversation. Professional retouchers solve this with a technique called frequency separation, which splits the image into two layers — one for color and tone, another for texture — so editors can smooth blotches while preserving natural pores. The Adobe frequency separation guide walks through the exact workflow used by pro editors worldwide.

How to Fix It

  • Blot excess oil with a clean tissue before every shoot.
  • Skip heavy powders; use a hydrating primer and a satin-finish foundation.
  • Apply cream blush for a lifelike glow.
  • Use eye drops to reduce redness in the whites of your eyes.
  • Brush up on editing basics with a friendly walkthrough of essential Photoshop tools so you understand what retouchers can and cannot fix.
Before and after headshot retouching example
Before and after headshot retouching

🎨 Old family photos looking dull or discolored? Bring them back to life with a professional color correction service that restores accurate skin tones and true-to-life vibrance.

10. Low-Quality Cameras and Heavy Compression Flatten Details

Not every unflattering photo is your fault. Budget sensors introduce noise, over-sharpen edges, and crush skin tones into muddy pixels. Aggressive JPEG compression removes subtle midtone data, giving faces a plasticky, almost cartoon-like finish. Even motion blur from a slow shutter speed can soften your features into an unrecognizable smudge.

Modern cameras and phones now support HEIF, a newer format that stores richer color and dynamic range at smaller file sizes. If you want to nerd out on the technical differences, this side-by-side breakdown of HEIF vs JPEG shows exactly what you gain in tonal depth by making the switch. On older hardware, upgrading the body itself often produces the biggest visible jump in image quality.

How to Fix It

  • Wipe the lens with a microfiber cloth — a single smudge can cut sharpness in half.
  • Shoot in RAW or HEIF whenever your device supports it.
  • Keep the ISO low by feeding the sensor plenty of light.
  • Consider a modern mirrorless camera or a well-reviewed compact from a curated mirrorless cameras roundup.
  • Avoid heavy filters that resample the image and destroy fine detail.

Bonus: The Uncanny Selfie Problem

Selfies deserve their own paragraph because they combine at least four of the issues above in a single click. Wide-angle lens? Check. Very close subject distance? Check. Awkward top-down or bottom-up angle? Almost always. Unflattering indoor light? Usually. Add mirror-reversal confusion — because most phones flip the preview but save the un-flipped image — and no wonder selfies feel jarring.

The five-step selfie fix formula looks like this:

  1. Extend your arm fully
  2. Raise the phone slightly above eye level
  3. Push your chin forward and slightly down
  4. Turn your head 10–15 degrees off center
  5. Face a soft light source (window, sky, or lamp) directly

Follow those five steps and your selfies immediately climb an entire tier in quality. You can even practice them once in a mirror before opening the camera app.

How Professional Photographers and Retouchers Solve These Issues

Professional portraits look better because photographers control every variable that goes wrong in casual snapshots — focal length, camera height, light direction, background, wardrobe, expression, and timing. They also lean on skilled retouchers who refine the final image in post-production, quietly fixing what cameras exaggerate.

Modern retouching is not the plastic-perfect airbrushing of the early 2000s. Today’s editors preserve texture and identity while:

  • Balancing skin tone across the face
  • Removing only temporary blemishes and stray hairs
  • Softening under-eye shadows without erasing character
  • Reducing hot spots from flash or bright sun
  • Whitening the sclera without oversaturating it
  • Smoothing clothing wrinkles and background distractions

If you sell products, publish bio photos, or manage a growing brand, professional retouching becomes one of the highest-ROI investments in your visual identity. A clean background removal service or a professionally applied drop shadow can transform a raw product shot into a store-ready image within hours, no photography degree required.

💡 Need a magazine-quality image without professional equipment? Our precision-focused image masking service delivers hair-perfect cutouts and studio-clean photos in a fraction of the time.

Practical Pre-Photo Checklist

Save this list for the next time you know a camera is coming out:

  • Drink 16 oz of water 30 minutes before (plumper skin)
  • Blot excess oil with a clean tissue
  • Freshen your breath — subtle jaw tension leaves the face
  • Roll shoulders back and down three times
  • Lightly moisten your lips for even color
  • Fluff hair, then finger-comb once
  • Face a window or soft light source
  • Turn your body 30–45 degrees off camera
  • Chin slightly down, forehead slightly forward
  • Think of something genuinely funny before the click

The list feels silly the first time you run through it. By the fifth photo, it becomes second nature — and you’ll never take a truly bad shot again.

Meta Insight: “Real Life” Is Not a Fixed Standard Either

Here is a truth that rarely gets said out loud: the “you” in real life is also carefully curated. You see yourself in familiar mirrors, under familiar lights, from familiar angles. Change any variable — a hotel bathroom mirror, a friend’s iPhone selfie mode, an office elevator ceiling light — and the person you meet in that reflection also looks a little different from the one you thought you knew.

Photos are simply another combination of angle, light, and framing. The version they show is not fake and not accurate; it is one honest possibility out of thousands. Your task is not to become your mirror image on camera. It is to grow familiar with the version of yourself that the rest of the world already sees. Familiarity is a skill, and the mere-exposure effect works powerfully in your favor once you let it. Scroll through a hundred good photos of yourself and your brain slowly rewrites the reference file — until, one day, the person on the screen and the person in your head finally meet in the middle.

Frequently Asked Questions (FAQs)

1. Is the mirror or camera more accurate?

Neither is perfectly accurate. Mirrors reverse your face, so what you see is the flipped version. Cameras capture your true, non-reversed image but distort proportions based on lens type. Most people consider a photo taken with an 85 mm lens at a natural distance the closest to how others actually see you.

2. Why do I look better in some photos and worse in others?

Because the variables — focal length, lighting, angle, expression, and posture — change from shot to shot. Small differences produce big changes. When all five variables line up, you look great; when even one goes wrong, the whole image can feel off.

3. Are selfies more accurate than mirror reflections?

No. Selfie lenses have a wide-angle focal length and are held very close to your face, which exaggerates central features. Front cameras also often mirror the preview but save the un-mirrored version, adding confusion. A rear-camera photo taken from six feet away is closer to reality.

4. Can retouching make me look like myself again?

Yes — high-quality retouching should restore how you actually look in real life, not replace it. Professional editors correct temporary issues (redness, flash hotspots, harsh shadows) while preserving your identity, character lines, and natural skin texture.

5. What lens should I use for flattering portraits?

Use an 85 mm prime lens on a full-frame camera, or its equivalent (around 56 mm on APS-C, 42 mm on Micro Four Thirds). If you only have a smartphone, use the 2x or 3x telephoto option instead of the standard wide lens.

6. Why do I look worse in group photos?

Group photos require wider lenses to fit everyone, which introduces edge distortion. People standing at the sides of the frame get stretched horizontally, sometimes looking heavier or wider. Position yourself closer to the center for a truer appearance.

7. How can I look better in candid photos I can’t control?

Cultivate photogenic habits: good posture, active facial muscles, a light in front of you rather than behind, and comfortable body language. Practice makes casual photos automatically more flattering, even when someone catches you off guard.

8. Do phone beauty filters actually make me look better?

Filters may smooth skin, but they usually over-correct — thinning noses, enlarging eyes, and erasing character. Professional retouching offers a better balance: it enhances without transforming. If you want the polish without the plastic look, our retouching services deliver realistic results.

Final Thoughts: Stop Fighting the Camera

Looking worse in photos than in real life almost never means you look worse in real life. It means the camera is a translator that speaks a different visual language than your mirror. Once you learn the grammar — focal length, angle, light, expression — the translation becomes flattering rather than harsh.

Every model, actor, and influencer you admire has practiced these principles until they became invisible. You don’t need to fake perfection; you just need to know why the raw shot looks the way it does — and how to steer the next one closer to the real you.

The next time you flinch at a photo, remember: it’s not your face that’s wrong. It’s the physics, the psychology, and sometimes just the light bulb overhead.

🚀 Ready to look consistently amazing in every photo? Send us your images and let our photo editing team at Photofixal polish them to studio-quality — fast, affordable, and 100% natural results.